Thursday, August 1, 2013

Battle of Freeman's Farm

On Saturday we managed to pull together terrain and figures for the battle of Freeman's Farm (a.k.a First Saratoga).

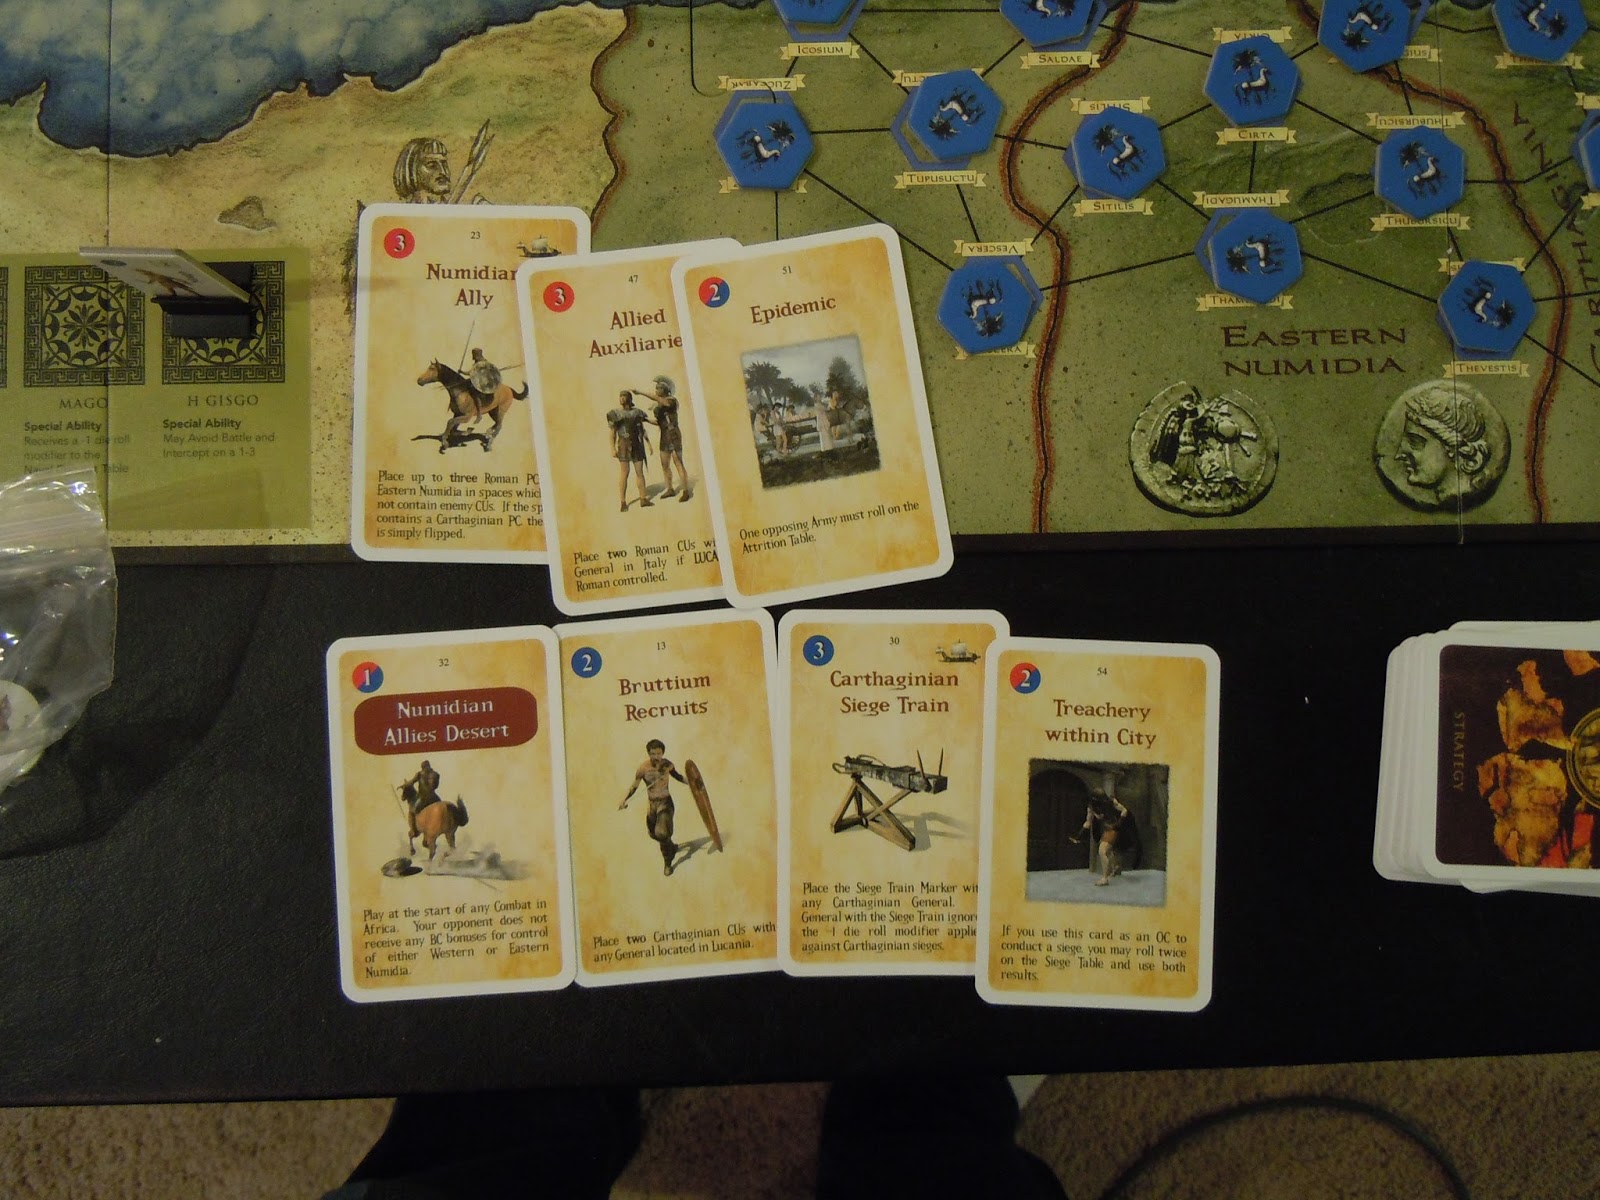
I did a bit of scrambling to put together a scenario for our AWI rules- Flint & Steel.  Table was 6' x 12.5' and scaled at 33yds = 2 table inches.  OOB was set at 1 to 33.  The map is below.  I will release the map, OOBs, and scenario briefings in a subsequent post.


And Fate smiles on the cause of Liberty once again, or does it?

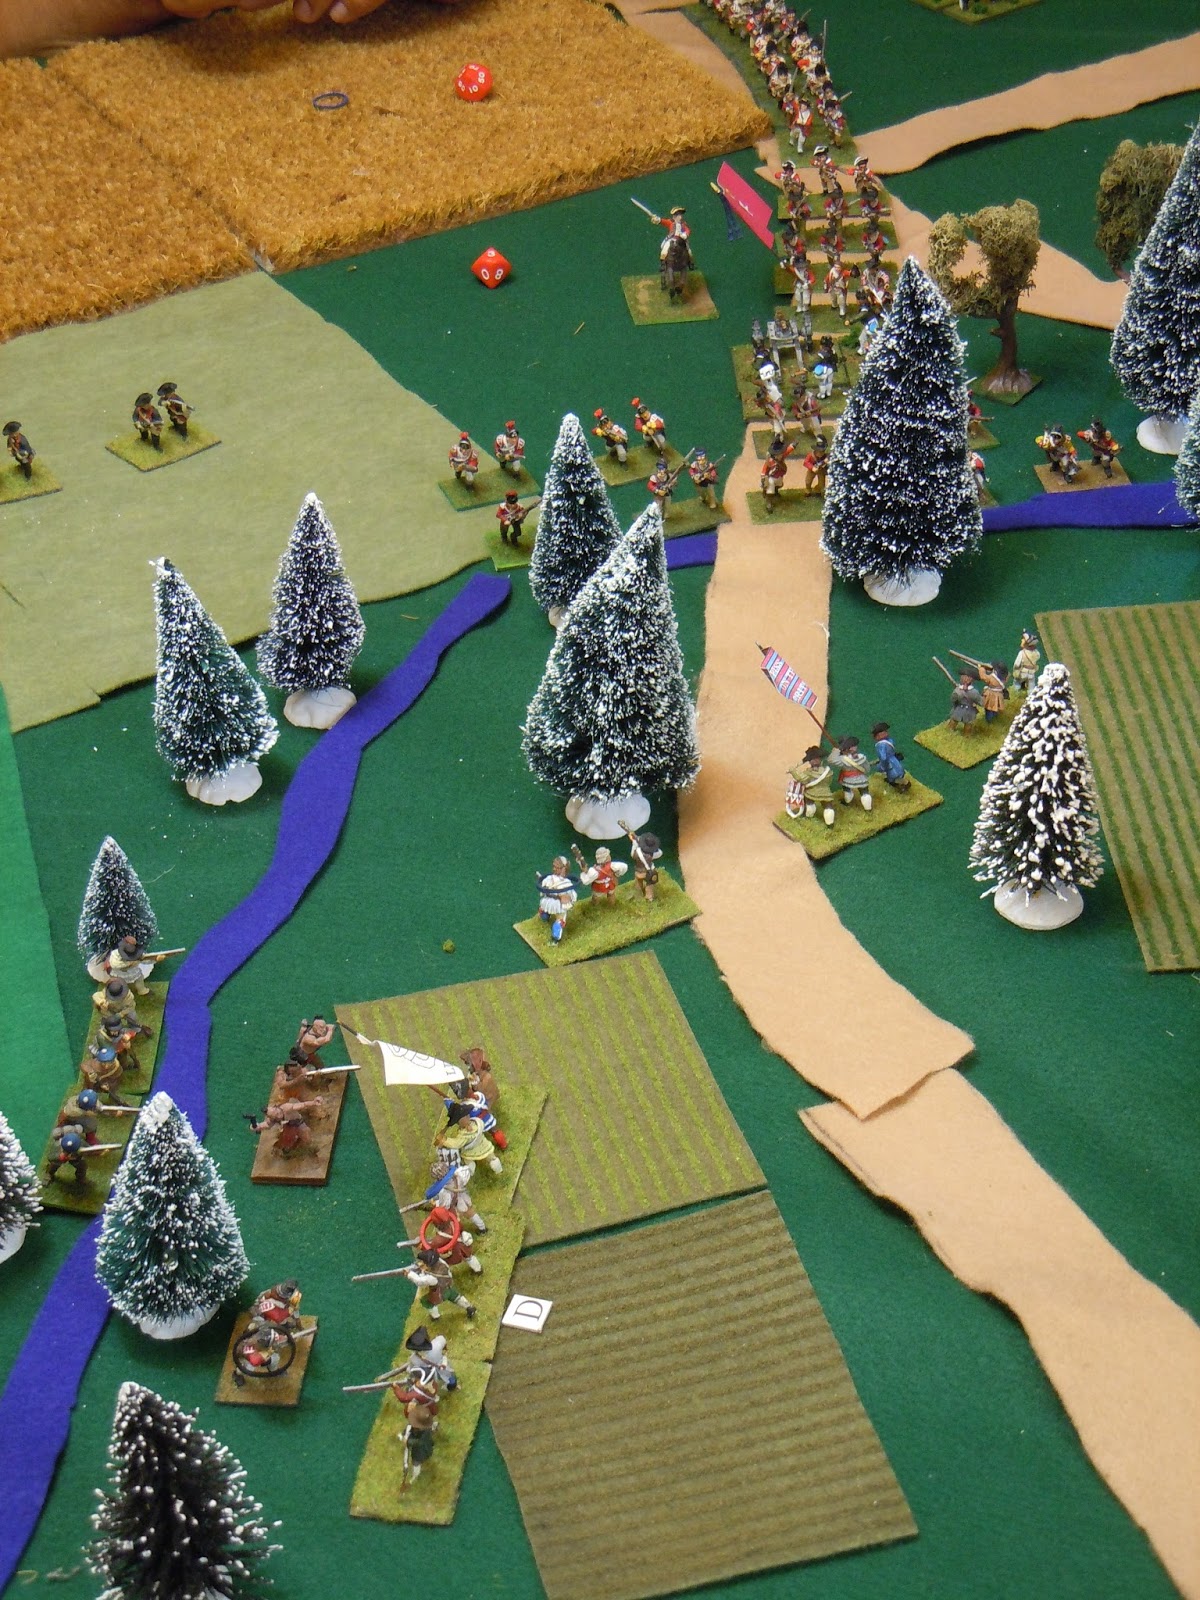
Scouts from Morgan's rifles have sighted three British columns leaving their camps on the Hudson and heading inland.  General Benedict Arnold moves to intercept.  Morgan's rifles along with Dearborn's light infantry take up positions amongst the light woods south of Freeman's Farm.  Brigadier Enoch Poor's brigade is ordered to move to support.   


The time is 1 p.m., the leading British column under Brigadier Hamilton arrives, hurried by Gen. Burgoyne himself.  The 9th foot covers the advance into Freeman's farm.


 Morgan's riflemen open up on the 9th foot surprising and disrupting their advance, however the drilled British infantry manage to give as good as they get.


The elements of Enoch Poor's brigade advances.  The 1st and 2nd Connecticut advance along the left, while in the distance the irregulars of Fraser's "advanced" guard enter Mcbride's fields.


Dearborn's Light Infantry charge the skirmish line of the 9th foot and force them to retreat, catching the 21st foot in road column, and sending them into a disordered flight.

The field of victory after a well timed attack!

Enoch Poor advances with the 1st, 2nd, and 3rd New Hampshire.


On the left the 1st and 2nd Connecticut Militia has a rough going at Coulter's Farm.  The Loyalist militia, Brunswick Jagers and British Marksmen beat the militia to the cover of the light woods, the defenders of Liberty were caught in the open.  


The time is almost 2 p.m. General Enoch Poor has arrived to support Morgan's advanced corps.  The General takes the initiative and rushes the 1st New Hampshire into a charge, taking the 20th Foot in the flank as they form into a skirmish line.  Once again British discipline saves the day for Hamilton, and the 20th Foot make an orderly, if hasty, retreat
The 1st New Hampshire clears Freeman's Farm, but to their left they can hear the British splashing across the creek.


The time is almost 3 p.m.  The Connecticut Militia is starting to crumble.  The Cook's 1st Connecticut manages to drive off the Brunswick Jagers, however Lattimore's 2nd is slowly being torn apart.  The 2nd has managed to largely suppress the elite British marksmen, but the Indians of the Confederation had a blood feud to settle.  Every shot told and the Americans remained in a constant state of disruption. 


The 1st New Hampshire is routed as the 9th foot, fresh and rallied, comes crashing out of the woods.  Benedict Arnold attempts to rally the Continentals, but is swept up in the rout.


The time 3:30 p.m. and the situation on the American left is becoming desperate.  Brigadier Fraser has stirred himself and the battalions of converged light companies and grenadiers are about to sweep the road of the American Militia and cut off the American line of retreat.


Hamilton send forward the 9th and 62 foot against the Continentals to decide the issue.


The 2nd and 3rd New Hampshire and the 2nd New York crash into the skirmish line of the 62 Foot, forcing them to run.  However, the sight of the fleeing Redcoats sends the Americans into a disordered charge!


General Poor is unable to keep order and the Americans crash into the orderly ranks of the 9th Foot.  However, the 9th Foot has been fighting, retreating, and rallying, and charging for almost 4 hours.  British discipline crumbles and the 9th foot once again runs for the rear in a disorderly mob.   


And yet further disaster befalls Hamilton.  Hull's volunteers, 300 men from Learned's Brigade, order by Arnold to advance through the woods in support of Enoch Poor come crashing out of the woods to the east of Freeman's cornfield, greatly distracting and disconcerting the 20th foot.... which ends in tragedy for the British.  A rifleman from Morgan's 11th Virginia spots a mounted officer desperately attempting to bring order to the retreating British behind Freeman's farm.  A shot rings out and Brigadier Gen. Hamilton falls from his horse.  The sight of their leader falling in battle as he attempted to restore order cases the rout of the 62nd and 21st foot. 

The Continentals starring down the remaining Redcoats


 But all the gains the American's make at Freeman's farm are for naught.  Gen. Fraser has broken the Connecticut Militia and they are streaming south.  The time is 4 p.m. and Brigadier Gen. Learned's Brigade is just beginning to arrive.  On the far right of the American position, Gen. Riedesel's Hessian column is spotted.

General Learned's advanced elements form up to delay Fraser's advance.

Riedesel's Hessians advancing to the sound of the guns.

General Arnold realizing both of his flanks are now in jeopardy orders a retreat.   The British have been delayed in their advance inland to outflank the fortifications and Bemis Heights, but were not defeated.  The American's suffered 200 casualties, the greatest burden falling on the 1st and 2nd Connecticut Militia, both of which eventually routed.  The natives of the Iroquois Confederation accounted for 50% of all British casualties inflicted. The British suffered 270 casualties and lost General Hamilton.  The majority of the loses fell on Hamilton's brigade, which ultimately saw two battalions rout from the field.

A tactical victory for the British, but not without significant cost, and the strategic result still hangs in the balance.  Burgoyne must hang onto the ground he has taken and then continue his advance inland to out flank the Bemis Heights fortifications.  However Morgan and Poor's Continental are almost completely intact and General Learned has 1,200 fresh Continentals about crash into Fraser's brigade.

Do the American's simply retreat? Can Learned hold Fraser?  Does Arnold try for Glory and attempt to smash Fraser's elite advanced guard between his three brigades?  Is there enough time before the remnants of Hamilton's brigade and Riedesel's Hessian's arrive?  --An interesting premise for a future scenario.


Friday, July 26, 2013

Hannibal Campaign Playtesting


I am quite new to this hobby that can take years and years to amass figures for various periods... however I've seen quite a few Carthaginians, Gauls, and Early Republican Romans massing on the fields (painting tables) of others.

Starting Setup
As I had GREAT cards for a siege...
Hannibal decides to take care of Massilia on his way, but of course a series of poor rolls [that had double bonuses!], fail and the siege ends up taking most of 218 B.C. 
Hannibal crosses the alps and due to more bad rolls and loses 20% of the force including half the elephants. Desperate for victory and reinforcements, Hannibal meets Publius Scipio larger force at the Battle of Trebbia. 
The Battle of Trebbia was a near run thing... a very near run thing.  8CU for Carthage vs 10CU for Rome (however allies and local friendly Gauls boosted Carthage's "battle cards").  At one point Publius' frontal assault almost broke the Carthaginian center (Hannibal had to make a dice roll with a 33% chance of losing the battle).  A flanking attack saved the day.  For Rome the loses were light... 10% for battle casualties and 20% for the retreat (3 CU). Carthage... another 3 CU losses, meaning Hannibal was at 50% of the numbers he started his march to Italy with.

The "Allies System" and combat losses/attrition may need to be adjusted for miniatures campaign purposes as will be seen further on.

Hannibal rolls the worst possible result for casualties. 
Battle of Mutina, 217 B.C.  Hannibal meets Publius Scipio again at the newly founded Roman Colony of Mutina. 
  Carthage CU 5 vs Roman CU 7.  Publius who had multiple battle cards to play to give him a leg up at Trebbia is out of tricks.  Hannibal, despite fewer troops, easily wins the battle and with the "double envelopment" bonus the remains of the consular legion are wiped out and Publius is gravely wounded.

Hannibal finishes what he started at Trebbia

New year and new consuls, Marcellus leads an attack into Etruria and is nearly wiped out...
 Hannibal ambushes Marcellus near Lake Trasamine Carthage 6 CU: Rome 5CU and is wiped out with only 1 CU making it off the field.

Carthage opens a new front in Sicily under Hasdrubal 
 Carthage (me)  gets great cards for negating Roman's naval supremacy and lands troops in Sicily following Syracuse's defection to Carthage.  Hasdrubal manages to wipe out Tiberius Longus in a series of victories (10 CU on each side) across Sicily compounded by the local population defecting to Cartage (long retreats through unfriendly territory are deadly).

Test run got called here in 216 B.C.

I think with some minor tweaks for converting CU to the tabletop and the battle losses table this could work and more importantly in the first few turns of the campaign the system produced a series of playable battles on the tabletop.

Thursday, July 4, 2013

Independence Day and Some (Prussian) Fireworks

This Independence Day I celebrated by finishing up doubling my artillery to Empire standards.  Four half batteries are ready to take the field (16 artillerists and 4 guns)


The artillery themselves are based off a post made by Martin at http://befreiungskriege.wordpress.com/ as mentioned earlier.  This post is half to write down my paint mixes for the next time the artillery park needs an expansion.

The midtone on the carriages is approximately two parts Folk Art 720 Colbalt Blue and one part Americana Sapphire.  The highlights are about 50/50 Americana Sapphire and Folk Art 480 Titanium White.  All the metal work is supposed to be blacked so I did it in Vallejo 050 Dark Prussian Blue.  The gun is Vallejo Bronze highlighted with Vallejo Brass and black washed with the Vallejo Black Shade.

Although I find Vallejo paint annoying to work with (drys incredibly fast and the D. Prussian Blue is a nightmare to get out of brushes) and hit-or-miss to purchase (some are not exactly the same shade or arrived separated and never really reintegrated) the Vallejo Black Shade is a favorite.  A friend prefers to just make her black washes, but the Vallejo shade is darker, applies more smoothly and in generally I find creates less of a mess and re-highlighting work.


Next up on the writing down list is the recipe for Regulation Prussians!  The Kollet is Vallejo Dark Prussian Blue for the shadows (base coat), Blick Dark Light Blue Midtones and Americana Sapphire highlights.  Ceramcoat Opaque/Bright Red/Vallejo Scarlet.

The Pants are two-colored Ceramcoat Charcoal and Ceramcoat Rain Gray, highlighted with the Rain Gray.  All blacks are Blick Black and whites are Folk Art Titanium White.  The canvas haversacks are a mix that I try differently just about every time I make a run of Prussians. All buttons/gold lace are done in Vallejo brass.

EDIT: Leather Bits: 2x Ceramcoat Iron Oxide, 1x Ceramcoat Raw Sienna, 3x Americana Heritage Brick

Monday, June 17, 2013

Empire Campaign System

A week ago after an impromptu game I got to demo test the Empire Campaign System on a limited basis.  This is a fictional scenario with two identical forces opposing each other across the Elbe.

French Advance from Leipzig;  Prussians deployed to observe Torgau and Wittenberg
French Cavalry Crosses the Elbe; Prussians in the Dark

Prussian Light Cavalry Bde (Landwehr!) manage to observe the French Cavalry Corp.
In the fading light the Saxon Cuirassier are identified.  The French, being expert light cavalrymen manage to detect that there are cavalry out there somewhere... they think...
French push the Landwehr  Cav. Bde back
French Infantry Corps get tangled up in the bagged train of the Cavalry Corps at Dessau slowing their crossing of the Elbe.  The contact intel has reached the rest of the Prussian army and they start to concentrate.
French call it a day 9:00 p.m.;  Prussians take extra movement/fatigue and night march.
The lead Prussian infantry corps attempts to surprise and push back the Cavalry from Rosslau--and fails miserably and is forced back with light casualties.
Prussians spend the night concentrating.  A regiment has swept the left bank of the Elbe from Torgau to Wittenberg and another Brigade is sent to watch the minor road to the north that winds its way to Potsdam.
Prussians are resting off their fatigue.   The  French are waking up, eating breakfast and spend their extra movement so they can walk on the field in battle formation.  Battle Starts at 10:00 a.m.  with the French advancing upon Koswig.
A Infantry Corp and a Cavalry Corp are holding Koswig.  The  French  are fully concentrated with two Infantry Corps and one Cavalry Corp. The Prussians are playing for time.  A fairly fatigued Infantry corp will arrive at 12 noon.  (The lead Prussian Corps could have tried to get some fieldworks dug, fatiguing a LW battalion significantly, but forgot to do engineering)

Some Observations on our first go:
  • The map needs to be enlarged for easier movement (even the the small card markers get unwieldy quickly as forces concentrate
  • Paperwork will be significant and all the more reason to try to find ways to offload some of the work onto a computer
  • The movement seems to be a bit off.  For the map itself with so many rivers and streams movement might be limited to something more reasonable, however on a major road with no defiles or rivers you can march an infantry corp 30 miles a day without incurring straggling or significant fatigue that couldnt be slept off in a single night.  
    • Now a 30 mile day is certainly possible, but seems a bit much for your "average" especially since it would not trigger any straggling.  Every 4 hours of normal marching gets you 3 fatigue.  Straggling doesnt kick in until 12 fatigue.
  • Doing the campaign would require a pre-"game day" session as it would take sometime.
  • The campaign system is pretty amazing in that it covers just about everything, including disease, straggling, engineering, hospitals, trains, supply, reconnaissance 

Tuesday, June 4, 2013

How I Learned to Stop Worrying and Love the Command Failure

Our last 3 Napoleonic games have all featured command blundered that significantly altered the course of events on one of the flanks.  Many rules feature some sort of command and control system that adds in arbitrary "failures" which prevent commands from reacting (or reacting in an unexpected manner).  Often command leader failures lead to frustration--I've certainly experienced it--but I don't think a set of rules is complete without it, notwithstanding the many variations of "they're 200 yards apart of course they will advance together!"  As the title of this post suggests, I'm embraced my inner Dr. Strangelove and embraced the Command Failure.

Austrian's sitting pretty, but watching idly as their comrades are routed.
My club played two games over memorial day weekend and on our rest day in between, I was poignantly reminded of why command friction and failure is so important.  First, off a disclaimer... I have no military background nor do I have expertise as a military historian in the 18th and 19th Centuries.  However, I have had the opportunity, the pleasure, and the sometimes headache of organizing and leading small to large groups in various PvP (player vs player) MMO or FPS settings, which recently reminded me just how common command and control failure is--even when everyone involved has the equivalent of a radio strapped to their heads.

This past Saturday (between our miniature games) was a minor affair.  A skirmish between two sides of approximately 10-12 combatants each.  I was leading a slightly outnumbered group in defense, awaiting for allies to arrive.  Long story short, the allies approach is noticed by the enemy, who conveniently string themselves out chasing our allies.  I manage to redirect my force, rally them, look back and confirm everyone   was on site, then called for a "follow me".  I tear into an orchard, find the enemy's flank/rear in a perfect opportunity to divide and conquer the larger force and charge.  I quickly realize once the our foes turned to face us that the only person with me is my sub-commander/NCO (who up to this point I always had bringing up the rear ensure our coalition force remained together).  Instead of wiping out our foes we end up trading kills man for man.  The rest of my force was off in the woods chasing a lone straggler.  Command Failure.

12th IR taking advantage of Marshal Ney's command and control failures
and rolling up Girard's division. 
I've been playing PvP games for 15 years as a commander, NCO, and grunt.  I've commanded numerous skirmishes on the order of 10-75 combatants, a handful battles (often defensive sieges) closer to 300 total combatants.  I've been an NCO in battles and coalition political leader in combats of up to 1000-1500 and I've been a grunt "trigger-puller" in battles involving up to 3000 players.  More or less in everyone one of those contests the leadership/commanders job was 40% preventing internal friction from splitting up the force (and giving the enemy easy kills) and 60% worrying about whatever the enemy is doing.  (Smaller more veteran forces proportionally shifts that balance more heavily in favor of the enemy--and really takes the load off the man at the top).  Much of the cohesion issues in PvP gaming is player stupidity, desire for independent action, and quick kills.  In historical gaming/simulation our rules are attempting to model our figures putting a lot more on the line than pixels.

Which is a long way of saying I was once again reminded How I Learned to Stop Worrying and Love the Command Failure.

Thursday, May 30, 2013

Empire and Skirmish, Part II

Voltigeurs to the Advance!
I recently had nice 2.5 hour drive, which I of course used gainfully by trying to crack the Skirmish question.

After much conversation with various members of the group and some good thinking time in the car here is my proposal:

The Skirmish phase, like bombardment. represents the activities of an entire hour of combat.  Any skirmishers involved, whether they win or lose, may not issue further small arms in the tactical combat phase (except for return fire, opportunity fire or supporting defensive fire).
The Skirmish "Winners":

  • The winning skirmishers may continue to act as screens in the tactical phase or can opt to withdraw to behind the ME frontline of formed troops prior to tactical combat.
  • The winners conduct their "free shot" per rules, limited only by max weapons range.
  • The winners suppress the opposed skirmishers allowing their side to advance and bring fire at full effect upon the enemy.  
  • Skirmishers involved (integral or otherwise) may not initiate small arms. 

The Skirmish "Losers":

  • Defeated skirmishers must withdraw and take casualties per rules.  
  • Defeated integral skirmishers form up with their units and may count for Infantry mass, but cannot deploy or conduct small arms.   
  • Skirmish losses for withdrawing screens can never be less than one figure, but in all other cases skirmish losses are rounded down.

When to Use Skirmish Combat:

  • When you wish to suppress opposed enemy skirmishers so you can bring fire on opposed formed MEs and cause casualties which degrade enemy combat performance  (without skrimish combat, skirmish screens cannot be forced to retreat without charging or advancing formed troops to point blank small arms range).
  • When your skirmish screen is unopposed, but you want to close with the enemy with formed troops or otherwise get a the "free shot".  Each victorious Excellent skirmisher fires like Old Guardsmen and each victorious Good skirmisher fires like a Grenadier (Crack Line for British) at point blank range, with little risk to themselves. 

Tactical Consequences of Rule Change:

  • Integral skirmishers that are used in Skirmish combat cannot be used to "bring fire" later on in the tactical phase.  To keep the initiative the parent unit would have to move extreme range and engage in small arms.  For Non-British trained armies, a 12 casting front line would fire/receive return fire at between 72% (Old Guard) and 12% (Conscripts/Landwehr), with average being 24% (Crack/Vet Line).  British trained would fire at between 72% (Guards) and 36% (Crack/Vet.), with Conscripts and lower being unable to return fire.  

This proposed change attempts to reconcile both camps.  Skirmish combat is retained, but integral skirmishers do not get multiple bites at "skirmish combat" per hour. No changes are made to the ability to screen for troops engaged in skirmish combat and a bright-line rule is established for what to do with integral skirmishers when they lose.

 I've added the option to withdraw behind the front line at the end of skirmish combat to clear the field so that MEs may bring fire more easily and keep the initiative. I also clarified how to deal with fractional casualties (as skirmish combat gives casualties at a flat % of a force).

Monday, May 27, 2013

Empire and Skirmish

My gaming club has had difficulty selecting a ruleset for Napoleonics.  Part of it comes down to Simulation vs Game.  Part of it is having to rebase or double (or triple) the number of figures needed (and associated expense).  And Part of the difficulty is the reputation of Empire (whether correctly or incorrectly) for being overly in favor the French.

After trying Empire III (for others amongst the group its re-learning) it quickly became clear that 1) the rules are not always clear and lack examples and 2) the charts/flow charts are clunky taking up a lot of space and do not always contain all the information/exceptions without reference to the rulebook.  At times it seems like Empire V is needed as reference help interpret what was meant in Empire III (were using III as its less detailed/more simplified)

All of which is background to how to handle skirmishing.  Can one cavalry regiment on an entire attack front neutralize skirmishers? Do retreating integral skirmishers that must "withdraw" have to stand down for the entire hourly round per the rules?  Should they be able to fallback to their units?  Can they count for infantry mass in close combat? Is allowing integral skirmishers to fire each impulse (1-3 times per round) on top of the skirmish combat round to much? (potentially allowing a single regiments skirmish company to cause up to 6 castings of casualties (360 men) per hour.

I've read 5 or so threads on the Yahoo EmpireNapoleonics Groups that go back and forth on this.  Here are just a few of the recurring thoughts:

*Empire V is terrible and Empire III's skirmish combat got it right!
*Empire is a Corps/Divisional game, the actions of skirmishers should be abstracted! and it Goes Faster!
*What do you do about integral skirmishers that must withdraw, what can they do as part of their unit for the rest of the hour?
*What should be the width of the skirmish determination be (this apparently changes whether you use Emp. III, Rep. to Emp., or Emp V.)

I'm not sure what the solution is as of yet.  The rules seem to work well for non-integral skirmishers, e.g. entirely unformed units.  They go out and do their thing at the beginning of the round and if they lose they stand down for an hour.  If they win they continue to screen the units behind, tie up enemy artillery etc. Without the skirmish combat round there is no "driving off" the enemy skirmishers, each side with skirmishers retains all the tactical advantages of them.  However, with integral skirmishers you run into issues with 1) what do with them when they loose; 2) does it best reflect skirmish conflict for both a skirmish round and then integral skirmishers being used tactically;  and 3) does #2 led to integral skirmishers being everywhere all the time beyond what is properly reflected in a single hourly round.

 At the moment I'm almost inclined to the Empire V, solution.  There was an interesting quote attributed to the Great S. Bowden on one of the threads to affect of "the fate and actions of a single battalion are of no consequence on the scale of Empire".

I expect there will be more discussion on this to come.

Saturday, May 4, 2013

Leaderless: Calpe Command Set PC5

First Corps is currently up to brigade strength.  However, staffing out the command is progressing slowly.

I've been looking for a few figures for I Corps Reserve Cavalry commander Von Roder and accordingly purchased Calpe Miniature's Command Set #5.  I've yet to find a preview online of the figures such as at triangle miniatures so here I've attached a few photos.

From left to right: General, ADC, Trumpeter, General Staff Officer


The figures were without flash and the poses are great.  I was thinking of possibly even splitting this up and using the ADC for another officer stand.  But then a thought occurred,  I realized this stand might actually be great for an old Hussar commander like Zeiten.  Certainly with his old regiment under his command (1st Silesian Hussars) he might detach an old veteran or two to act on his staff.  The trumpeter in this set is in a hussar's campaign dress, wearing his pelisse.

And now a dilemma who should these fine figures get assigned to!

Thursday, May 2, 2013

Council at Linden Heights

Way back in late March we played a lovely little AWI game and also agreed to structure and formalize our gaming arrangements.  AARs for our big games will likely be posted on the new blog over at http://historicalwargamingla.wordpress.com/

You can see the inaugural post and the results of the Council at Linden Heights here.

The Cause of Liberty Shall Live On!

Tuesday, April 30, 2013

The Olde English SAGA

My local gaming store recently opened up a historical miniatures group and I thought I'd pop in for their inaugural night of SAGA.  I was quite excited after reading all the buzz around the SAGA ruleset and was glad I would get a chance to try it (without shelling out the $$).

Thus a roaming band of Hiberno-Norse found them selves on the shores of England fighting the huscarls and picked men of the aethling prince Aethlstan of East Anglia.

The battle occurred in a village built next to the apparently bottomless and unfordable pond.

The Hiberno-Norse leader Ua Reilley splits his forces.  His elite hird men flank left, his warlord, berserkers and lesser warriors go right.  It must have been an auspicious day for the pagan Anglo-Danish forces.  The land itself seemed to sap the Norsemen of their vigor and will.  Fatigue points began to stack up and troops failed to move.

Finally the Ua Reilley's berserkers had enough and charged forth, leaving their comrades far behind.  The Anglo-Danish mounted contingent had been waiting for this chance and rush forward to meet the enemy.  In a close battle three beserkers were cut down, but the last lashed and out and brought down a horse and rider while the Anglo-Danes retreated from the advancing viking throng.


The last berserker rejoins his comrades as the rude Anglo-Danish welcome  jarred him from his frenzy
On the left it was a heads up battle as 12 elite viking hirdmen attempted to revenge their comrades and cut their way through to Aethelstan. The charge after the viking's earlier fatigues met with little success however, and the vikings were thrown back by the Anglo-Danish shield wall having lost 5 of their number, their only solace in having wounded Aethlstan in a glancing strike.

Ua Reilley's picked men attempt to end the battle by cutting their way through to Aethelstan

 The Vikings recoiling from the Anglo-Danish shield wall.

The Anglo-Danes rally behind Aethelstan's charge and cut the remaining Vikings hirdmen down, leaving only one to flee.


Lone Viking hirdmen exercises the better part of valor.

On the right Ua Reilley attempted to retrieve the situation and led one of his warrior bands against Anglo-Danes.  Viking fatigue was again decisive and their sluggish attacks served only to weaken the warband further. The warriors are thrown back by 8 stalwart huscarls, who lose only one of their number in the process.  The retreat left open Ua Reilley himself and although the great warlord manages to cut cleave through shield and mail to fell three of his assailants, the Norse chieftain falls surrounded and cut off from his men.
Ua Reilley (flag standard at right) falls to the press of Anglo-Dane huscarls
 And that was my first game of SAGA! Glorious Victory.  Overall it was fun.  Essentially the differences between troops are abstracted.  All elite warriors have armor of 5 (must roll a 5 or 6 to hit), warriors have armor of 4 and levys have armor of 3.  Gather up fistfuls of d6 and have at the enemy!  Most of the tactics/strategy comes down to the abilities on the "battleboard" which grants you the magic to cancel enemy activation orders or add fatigue points to the enemy's troops.  Very much a "game" on the Game vs. Simulation axis, but easy to understand and fast play makes it quite enjoyable.