Showing posts with label 1813. Show all posts

Thursday, December 22, 2016

Vive l'Empereur!

Vive l'Empereur!  Wait... what?!?

The Iron Marshal has been tasked with organizing a new provisional corps.

A fine gift from my friends in the South.

Davout reviews his First Provisional Division of four battalions.

Gen. de Brigade Le Frog commands for now.


The Second Provisional Division of five battalions
lacks any commanders


The Second Provisional Division clearly better painted.... err uniformed & supplied!


Divisional Artillery Assets are rebuilding


Davout's Provisional Corps:
Seven Ligne Bns.
Two Leger Bns.
One Foot Battery


The True and Honest Prussians were complaining of a lack of French to scrum with and so a great Ebay campaign has been waged over the last year and a half.  Von R. has another ~5 or so Bns. waiting for command stands to fill them out and another 2 Bns. are in the mail from Ebay.
Likely will have around 15 Bns of infantry when its all done.

Much has changed in the last 18 months.  A move far to the North has caused little gaming or painting to occur.  The hobby is not quite dead and the lead pile is assailed with brush in hand once a blue moon.  Will need to find some time to find a new gaming group or hold a few solo games now that I am acquiring both sides.

Wednesday, March 4, 2015

Combat at Milkel Carnage&GloryII Scenario: Part 7 De Tolly's Disaster

The Eichberg Series: Part OnePart TwoPart ThreePart FourPart Five, Part Six

De Tolly's Disaster: Milkel
This scenario is the second counter-factual scenario for the "mini-campaign" of Barclay de Tolly just prior to Bautzen. Due to the central location of Milkel and its position along several highways it will be the setting for two scenarios.  This second scenario essentially assumes the Russo-Prussian forces act as historically and the French forces, through superior initiative/luck and out maneuver the advancing Russo-Prussian forces.

I cannot take full credit for the inspiration behind this scenario, Petre more or less spells it out in his criticisms of De Tolly and Bertrand/Napoleon.

History and Counter-factual Assumptions:
For the background see Part One.  For purposes of this scenario we assume that the Russo-Prussians act historically, e,g.  De Tolly's steps off at 1 a.m. in three columns of advance.  We further assume that Peyri's 15th Division and Lauriston's V Corps act historically... therefore the Combats at Konigswartha and Weissig/Eichberg are also assumed.

(Note: one could argue for having 15th Div. march with IV Corps instead of marching to communicate with V Corps per historical orders from Berthier. This seems a rationale arguement, but it should be remembered that such an change means the Russo-Prussians may have several hours of local superiority over V Corps and good field position to concentrate their forces and envelope V Corps.)

The great counter-factual assumption is Bertrand acts on the reports of his sentries and uses his initiative to assail the flank of the advancing Russo-Prussian forces.  I assume that as the most advanced unit observing Bautzen, Bertrand would not leave without permission from Imperial HQ. It is just over seven miles from IV Corps posts at Kleinwelka to Milkel.  The final timing, and arrival is up to the the gamemaster as discussed below, needless to say Bertrand could have covered the seven miles if he stepped off between 8-10a.m. and arrived in Milkel before the completion of the Allied contests at Konigswartha and Weissig, with daylight left to spare.

De Tolly likely left behind a garrison for Milkel, but I assume said garrison successfully skirmished briefly with the French and retreated back to the west towards the main force and warned De Tolly of the imminent danger.


The end result of this Bertrand's initiative and vigor, being the near encirclement of De Tolly's expedition.  (Note: the Allies are not actually encircled, but the three routes back to Allied lines are cut by Bertrand at Milkel; to the W/SW there are no immediate French troops, but any advance in this direction would just further envelop De Tolly's forces.) 


Orders of Battle:
Unit Ratings are based upon Bowden's Empire V, translated roughly to C&GII.  Units have been amalgamated to fit our groups basing.  The French are based on Bowden and Nafziger.  The Allies Nafziger, supplemented by Hofschorer.  Note for the allies neither source gives actual numbers for some of the Russian divisions, and were therefore estimated. Estimate Russian Regiments were assumed to have 1 battalion of 480 men.

C&GII generally recommends a ratio of 1 officer per 3 tactical units total.   The Russians are clearly over-officered, but I wanted to show the general structure of the OOB for potential use in other rulesets and have in fact combined a few brigades already. The Prussians Brigade commanders are labeled as Divisions in the OOB. The "brigade" commanders in the OOB are actually regimental commanders, which per the Prussian system of standard deployment were put in charge of one of the "lines" of troops.

As this is a counter-factual scenario, the OOBs are vague, especially the Allies.  Von Yorck is unavailable and his holding off V Corps at Weissig/Hermsdorf.  Von Yorck received reinforcements from one if not both of the Reserve Grenadier Divisions. Tschaplitz/Lageron are regrouping from route 15th Division at Konigswartha.  Of these options, the only clear wrong choice is Von Yorck.  Everything else is up for grabs to various degrees for what Barclay would throw at Bertrand to break out of this encirclement. The OOBS for the Allies have been given in full in

Allies:
Note: Yorck's Corps had a half battery of 3lbers, which I have chosen to distribute as regimental guns.  If regimental guns brings back bad memories of 1806, can always run them as a battery.  This is the entire Allied force. 


French:
Note: Morand's 12th Division is under-officered for C&G standard 3:1 ratio.  It is reasonable to consider giving Bertrand a staff officer to assist with rallying. Nafziger includes battalion guns for the 13th and 23rd Ligne which I have assigned to the I Battalion.
Terrain:
 Milkel is part of the "Oberlausitzer Heide- und Teichlandschaft"/Upper Lusatian Moorland which is to say there are a lot of water (ponds, streams) and wooded areas.  The German Wikipedia page for the town of Milkel indicates the population in 1890 was 358. The Schloss and church in the town were present in 1813.  The Klein Spree runs just north of the village and the village is the intersection of the roads from Wartha/Steinitz, Konigswartha, Klix, Bautzen, and Uhyst.


The Red Boxs are 12.5ft x 6ft table at 1"=25paces (28mm)

Counter-Factual Historical Scenarios:
As described above in the history section the Russo-Prussian movements and the movements of French V Corps and 15th Divisions have been held historical. Bertrand by acting on his sentries reports from the pre-dawn hours mobilizes IV Corps to flank the Russo-Prussians under De Tolly. The timing is fairly fluid, in my mind its reasonable for Bertrand to steps off between 8-10 a.m. after communications with Imperial HQ and reserves are found (likely the Imperial Guard, as rest of the infantry corps are still arriving) to observe Bautzen. Bertrand covers the 7.2 miles and arrives Milkel around 2-5 p.m.

The main scenario simply has Bertrand's 12th and 38th Divisions deployed around Milkel and prepared to hold the position until further French assets arrive (V Corps or later III Corps).

As discussed above the Russo-Prussian forces are complete speculation, other than not the Prussians. For my money, it would have been one of the Reserve Grenadier Divisions, supported by Langeron's regulars (these being the freshest troops) that would have led the breakout attempt.

Depending on start time, the Russians must breakout within approximately 5 hours (military dark).  It is assumed the Prussians can hold out that long as they did historically, but no longer.

De Tolly likely left some form of garrison, be it cavalry patrol, infantry company or even infantry battalion/brigade.

Reinforcements:
French have none.  As discussed above its up to the GM for the Russians, anything is in play except the Prussians.

Fatigue:
As noted in the Eichberg scenario this can be customized to suit your goals for the game (more fatigue=slower game).  The Russians have been marching for most of the day and Langeron/Tschaplitz were engaged from 1pm to 4pm overrunning and routing 15th Division.  Even with rest periods 60% fatigue is arguably generous.  For Bertrand his troops have only covered seven miles and would have had time to rest in occupying Milkel, I would start them at 80%.

Start and End Times:
Start between 2:00 and 5:00 representing IV Corps march of 7.2 miles from their historical position at Kleinwelka. Sunsets at 8:15 and "military dark" is at 9:30 (per Empire Campaign System for Saxony region).

Terrain:
The Klein Spree is fordable, but is disruptive terrain. The woods are medium woods.  The ponds are impassable.  Lippitsch and Milkel are wooden structures.  I suggest placing additional light/medium cover lineal obstacles (fences, orchards, outbuildings) to represent the rest of Milkel and Teicha.

Table can be played either direction as seen in Part Six


Variations:
15th Division Marches with IV Corps
15th Division marches with IV Corps on Milkel.  This actually creates two different scenarios.  One, here at Milkel where a larger French force of nearly 23,000 (same size as De Tolly!) has cut the line of retreat for De Tolly.  The second, is a Weissig variation where Tschaplitz/Langeron envelope the left flank of V Corps between Wartha and Weissig while Von Yorck holds Weissig. Russo-Prussians have 2-3 hours to achieve a complete victory (this second scenario at Weissig is probably only feasible in 15mm).

Meeting Engagement
De Tolly left one of Reserve Grenadier Divisions between Oppitz and Milkel to be able to support either the Prussians or Russians.  Cossacks make contact with IV Corps with sufficient time for the Russian Grenadiers to garrison Milkel and attempt to hold out until the De Tolly arrives.  Create a random system for reinforcing both sides, would suggest each French Division arrives ~45-1hr after the previous.

Conclusion:
The possibilities and variations are numerous and for my two cents the counter-factual assumptions needed to bring them about are not terribly unreasonable or out of the realm of possibility and are more or less implied by Petre in Last Campaign in Germany as what Bertrand should have done. Bertrand's flank march would have likely turned May 19th into a disaster and potentially destroyed 25% of the Russo-Prussian army, imperiling the allied position at Bautzen.

Special thanks to Ravenfeeder for giving one of my scenarios a try and posting about it!  Gave me the nudge to get this final scenario posted.  Still have a couple of battle reports to put up on my backlog of posts.

Tuesday, February 3, 2015

Combat at Milkel Carnage&GloryII Scenario: Part 6 De Tolly's Gambit

The Eichberg Series: Part One, Part Two, Part Three, Part Four, Part Five

De Tolly's Gambit: Milkel
This scenario is one of a series of counter-factual scenarios for the "mini-campaign" of Barclay de Tolly just prior to Bautzen. Due to the central location of Milkel and its position along several highways it will be the setting for two scenarios.  This first scenario essentially assumes the French forces act as historically and the Russo-Prussian forces, through superior reconnaissance/luck, concentrate their forces instead of more or less blundering into the 15th Division and V Corps.  The next post will detail the reverse, a historical Russo-Prussian force with a more active French force.

History and Counter-factual Assumptions:
For the background see Part One.  For purposes of this scenario we assume that the French act historically, e,g Bertrand's IV Corps remains at Bautzen, except for 15th Division which marches to Konigswartha; Lauriston's V Corps continues its march on Klix via Steinitz and Milkel.

For the Russo-Prussian forces we assume either 1) Better Reconnaissance/More Cossack were allocated to expedition which was able to locate V Corps before blundering in to it, OR; 2) Barclay de Tolly choose to step off at 3 a.m. instead of 1 a.m. (or delayed the Russian columns until 3 a.m.).

Whether because of superior intelligence or because Barclay wanted two more hours of rest.  Lageron has just arrived at Milkel, Raiewski's Grenadiers are coming up in reserve.  The Prussians are on their longer march and are expected to arrive from the north.

The French 18th Division, vanguard of Lauriston's V Corps, marched through Weissig uneventfully at approximately 2 p.m.  It is 4 miles from Weissig to Milkel. At around 4 p.m. the leading elements of 18th Division encounter Russian forces at Milkel.


Orders of Battle:
Unit Ratings are based upon Bowden's Empire V, translated roughly to C&GII.  Units have been amalgamated to fit our groups basing.  The French are based on Bowden and Nafziger.  The Allies Nafziger, supplemented by Hofschorer.  Note for the allies neither source gives actual numbers for some of the Russian divisions, and were therefore estimated. Estimate Russian Regiments were assumed to have 1 battalion of 480 men.

C&GII generally recommends a ratio of 1 officer per 3 tactical units total.   The Russians are clearly over-officered, but I wanted to show the general structure of the OOB for potential use in other rulesets and have in fact combined a few brigades already. The Prussians Brigade commanders are labeled as Divisions in the OOB. The "brigade" commanders in the OOB are actually regimental commanders, which per the Prussian system of standard deployment were put in charge of one of the "lines" of troops.

France:
Note that most of V Corps consists of Regiments 135-155 which were formed from the "Cohorts", or men called up as a reserve when Napoleon started his Russian expedition in 1812.  Bowden goes into some detail about the formation of the cohorts and their training (or lack thereof).  It should be noted he indicates they do not have elite companies, only center companies and in Empire V terms are only allowed to enter into "semi-skirmish" formation.  To translate this into C&G, I did tick the box for skirmish capable, but these units should not be allowed to skirmish offensively.  This allows for the use of open order, which is somewhat analogous to "semi-skirmish" and needed given the amount of disruptive terrain on the table.


Allies:

Note: Yorck's Corps had a half battery of 3lbers, which I have chosen to distribute as regimental guns.  If regimental guns brings back bad memories of 1806, can always run them as a battery.  This is the entire Allied force.  As is discussed below how not all of these troops may need to be engaged.


Terrain:
 Milkel is part of the "Oberlausitzer Heide- und Teichlandschaft"/Upper Lusatian Moorland which is to say there are a lot of water (ponds, streams) and wooded areas.  The German Wikipedia page for the town of Milkel indicates the population in 1890 was 358. The Schloss and church in the town were present in 1813.  The Klein Spree runs just north of the village and the village is the intersection of the roads from Wartha/Steinitz, Konigswartha, Klix, Bautzen, and Uhyst.


The Red Boxs are 12.5ft x 6ft table at 1"=25paces (28mm)

Counter-Factual Historical Scenarios:
As described above in the history section the French movements have been held historical.  Through either delay, luck, or better intel, the Allies have achieved their goal of catching V Corps separated from supporting formations while concentrating the forces of the Allied expedition.  Both of the variations below can be scaled to fit your table, troops, and number of players.  As noted you could bring the whole allied expedition and all of V Corps if you have the time and space to play it out.

Reinforcements:
The first allied troops to arrive in either variation is likely Langeron's Russian Infantry Divisions. They have the direct march to Milkel and historically the three allied columns all stepped off at the same time.  Next would be Tschaplitz's Vanguard, followed by von Yorck's Prussians who have the longest route.  Personally, I would omit Tschaplitz to keep the scenario manageable, and to model any of the following counter-factuals: (a) the dispersion of the vanguard troops (cavalry especially) to achieve the superior intel (coupled with stepping off at 1 a.m. per history), or (b) screening force to the southwest of Milkel observing a possible advance by Bertrand's IV Corps, or (c) Tschaplitz scouts forward toward Konigswartha (and his historical orders), and meets his date with destiny and the foragers of the Italian 15th Division (casualties inflicted may not be as high without the reinforcements from the main Russian column, but Tschaplitz could likely over run the foraging parties just the same.)

For the French its fairly straightforward, the divisions come up in the assumed historical order 18th, 16th, 19th (based on the historical casualty returns).  The only potential variation to this is Peyri's 15th Division marching to the sound of the guns (assuming they went unmolested by Tschaplitz).  III Corps is unlikely to play a role; its vanguard only reaching Wartha around 5 p.m. which is just under eight miles from Milkel.

Fatigue:
As noted in the Eichberg scenario this can be customized to suit your goals for the game (more fatigue=slower game).  All forces have been marching for most of the day.  Even with rest periods 50% fatigue is arguably generous.  The Prussians and V Corps have had the longest marches. Langeron/Raevsky have had the shortest.  At a minimum I would set everyone to "acceptable" (80%) or "tiring" (60%).

Start and End Times:
Start between 3:30 and 4:30 representing V Corps march of 4 miles from their historical position at Weissig around 2:30-3:00 p.m.

Sunsets at 8:15 and "military dark" is at 9:30 (per Empire Campaign System for Saxony region).

Terrain:
The Klein Spree is fordable, but is disruptive terrain. The woods are medium woods.  The ponds are impassable.  Lippitsch and Milkel are wooden structures.  I suggest placing additional light/medium cover lineal obstacles (fences, orchards, outbuildings) to represent the rest of Milkel and Teicha.

Variation One "Set Piece" Combat:
Langeron starts deployed in Milkel/Teicha.  V Corps enters along the Oppitz/Konigswartha road. Randomize the arrival of Ravesky and von Yorck (and Tschaplitz if his command is not used elsewhere).  I would delay von Yorck at least an hour, if not more.  Prussians can enter on road to Lippitsch or Uhyst.  Raevesky should arrive in road column. Bring the flanking allied forces in battle formation, unless there are French forces within 24 inches of the table edge.  For French I would suggest making sure the second division arrives within the first hour in order.

Or ignore the above, setup Langeron and Raevesky on table and all of V Corps and play this as a set piece slug-fest, with de Tolly playing for time for von Yorck to deliver the decisive blow.


Variation Two "Envelopment":
By playing the table on the other axis we have the potential for a meeting engagement.  This is all counter-factual so there is no "right" answer.  Place the two forces equidistant from the town and start things off with a fierce struggle.  Or the Russians can let the French have Milkel (purposely or other wise), and set the pieces in motion for a single or double envelopment or a deft French tactical withdrawal in the face of certain defeat. 


Conclusion:
The possibilities and variations are numerous and for my two cents the counter-factual assumptions needed to bring them about are not terribly unreasonable or out of the realm of possibility.  de Tolly essentially needs to draw out V Corps, by letting them continue their march.  The Allies stepping off an hour or two later potentially sets all such requirements in motion.

Next Up: Counter-factual Scenario Two: Milkel-Allied Disaster! and the first Milkel Playtest AAR.

Monday, January 12, 2015

Combat at Eichberg Carnage&GloryII Scenario: Part 4 More (Local) Research


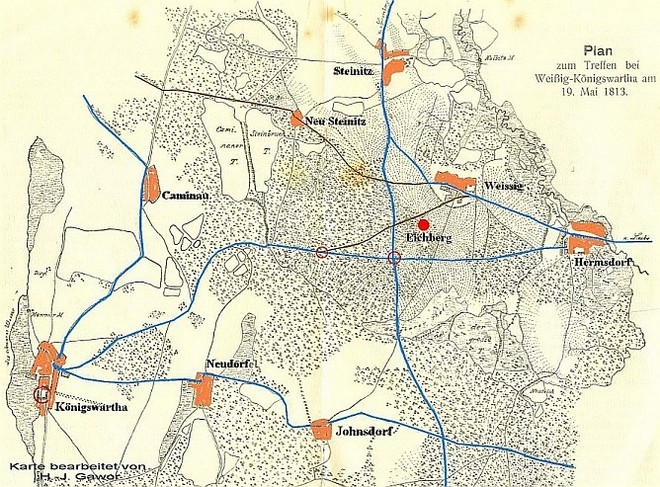
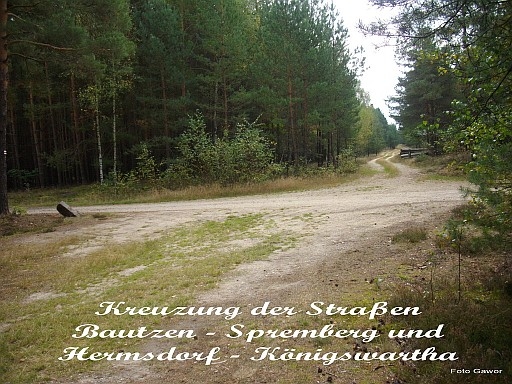
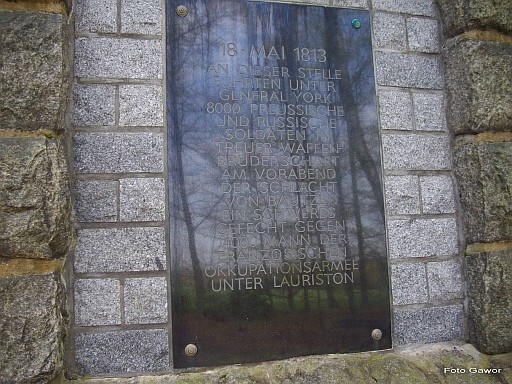
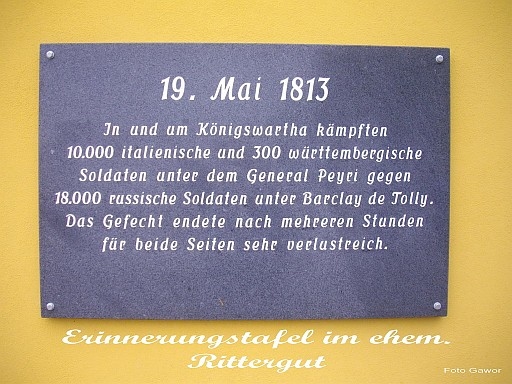
While trying to locate the Eichberg Denkmal on Google I stumbled upon some photographs, which eventually led me to the Konigswarthaer Geschichtsverein (Historical Society) and the work of Hans-Joachim Gawor, who I assume is a fellow hobby historian. Mr. Gawor's summary of the combat at Eichberg can be found here(in German).  There are two excellent photo galleries here and here, some of which are reproduced below.  The map below also gives an idea of the location of the Eichberg.


My German is grade school level on a good day, so this can be taken with a grain of salt.  My understanding of the gist of the tells a slightly different version of events from the accounts of Petre, Bowden, and Hofschorer:

The Prussians arrive at Hermsdorf approximately when they hear the cannon fire from Konigswartha (between 1 and 2 pm). Von Yorck's men stop for a rest and were very hungry and tired and the villagers of Hermsdorf fled before the men looking for food.  Although, the Italians are said not to have pushed scouts out beyond the forest between Konigswartha and Neudorf, there is no mention of the Italians caught dispersed and foraging. The Neapolitan Cavalry in Bowden/Nafziger is also Wurtemburger in this account. De Tolly at this time summoning  Yorck from Hermsdorf to wartha .  There was a desperate street fight in Konigswartha, and the Italians fell back with great loss to Caminau where they setup a new defensive line and were supported by portions of III corps.


Yorck on receiving the order, sent some hussars with a local guide along the Konigswartha-Hermsdorf road, when they encounted a French cavalry patrol that was driven off.  An officer saw the Eichberg hill to the north, and from their saw French column in the distance at Steinitz around 2:30. (The Eichberg is approximately 20 meters higher the surrounding country.) Yorck rushed the East Prussian Infantry and artillery onto the Eichberg.


The villagers of Weissig fled as the Prussians occupied the town and searched for food.  Fighting developed in the forest along the old Bautzen road to the West of the Eichberg.  Around 4:00 p.m. Yorck receives an order to fall back on Johnsdorf to as a reserve to the Russians at Konigsberg.  Yorck complies, but with objections.  After Yorck had evacuated Weissig towards Johnsdorf, he received the countermanding orders to hold on at Eichberg. The Prussians turn around and a "murderous" close action ensued, with the Prussians taking and losing the Eichberg on three occasions.  The fighting ceased around 9-10 p.m., at which point the Prussians withdrew.  There is no mention of any Russian reinforcements. From the map and text, I think the later fights were potentially in the woods and open area south of Eichberg.


To incorporate some of this information in a future scenario variation, I would suggest orienting your map more north and south along the old bautzen road (still visible on google maps, but not marked as a road for all its length).  I would also say there appears to be more open space south of Weissig and between Eichberg and Hermsdorf than in the areas current state.  The 1913 Eichberg photo shows a much less forested Eichberg. 


Sunday, January 11, 2015

Combat at Eichberg Carnage&GloryII Scenario: Part 3 Gaming Eichberg

As we saw from the Historical Research in Part One de Tolly's spoiling attack resulted in two combats at Konigswartha and Eichberg.  Unlike Konigswartha, Eichberg was a relative slugfest between two advancing forces.   Similar to Konigswartha, the historical details are a bit sketchy, which from a scenario design perspective allows variation and, (relatively) you can't do it wrong!


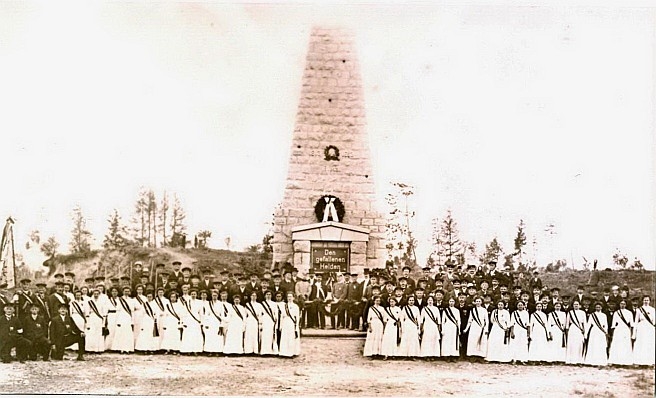
Eichberg Monument (constructed 1913)
Photos courtesy of Lohsa Town Website


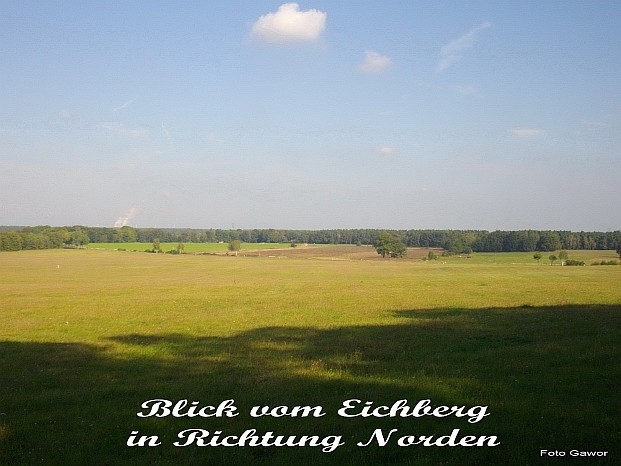
View from the Eichberg


History and Assumptions:
Eichberg begins likely between 2 and 3 p.m., with the Prussians taking up a strong defensive position near Weissig on the Eichberg. From Lauriston's detailed casualties list in his dispatch to Berthier (summarized by Bowden), it appears 16th, 18th, and 19th Divisions were engaged at Eichberg.  (Puthod's 17th Div. is a days march behind V Corps and does not arrive until the second day of Bautzen.)  Approximately 67 percent of the 1,550 casualties and prisoners reported by Lauriston fell on Lagrange's 18th Division; 20 percent fell on Maison's 16th Division.  Based on the casualties I assume that 18th Division was Lauriston's lead division and the first engaged.

At 3 p.m. von Yorck recieved an order from de Tolly to march on Johnsdorf to form a reserve for the Russians engaged at Konigswartha. Yorck responded with perhaps too much alacrity, and retreated from his position on the "heights" near Wessig.  Hofschorer indicates it was Steinmetz's brigade (the East Prussians and Lieb Infantry Regiments) which had held this strong position.  Once von Yorck had withdrawn to Hermsdorf, just under a mile away, a second dispatch arrived countermanding the previous order and directing von Yorck to hold on at Weissig.  With this second dispatch, de Tolly realized the Russians were not in contact with V Corps, but rather the 15th Italian Division from IV Corps.

De Tolly dispatched Raiewski's two Grenadier Divisions to reinforce von Yorck.  Hofschorer states that one division was sent to Hermsdorf and the other to Steinitz.  The second destination, suggests that Raiewski that at least one of the divisions was marching via Konigswartha and not Oppitz. Should the Grenadier division marching on Steinitz have completed this march it would have arrived approximately 1 mile to the rear of the French engaged at Weissig/Hermsdorf.

The fighting continues at Eichberg/Hermsdorf until nightfall and when de Tolly orders a night march and withdrawal via Klix.  The Coalition forces are back across the Spree on the 20th.


Orders of Battle:
Unit Ratings are based upon Bowden's Empire V, translated roughly to C&GII.  Units have been amalgamated to fit our groups basing.  The French are based on Bowden and Nafziger.  The Allies Nafziger, supplemented by Hofschorer.  Note for the allies neither source gives actual numbers for some of the Russian divisions, and were therefore estimated. Estimate Russian Regiments were assumed to have 1 battalion of 480 men.

C&GII generally recommends a ratio of 1 officer per 3 tactical units total.   The Russians are clearly over-officered, but I wanted to show the general structure of the OOB for potential use in other rulesets and have in fact combined a few brigades already. The Prussians Brigade commanders are labeled as Divisions in the OOB. The "brigade" commanders in the OOB are actually regimental commanders, which per the Prussian system of standard deployment were put in charge of one of the "lines" of troops.

France:
Note that most of V Corps consists of Regiments 135-155 which were formed from the "Cohorts", or men called up as a reserve when Napoleon started his Russian expedition in 1812.  Bowden goes into some detail about the formation of the cohorts and their training (or lack thereof).  It should be noted he indicates they do not have elite companies, only center companies and in Empire V terms are only allowed to enter into "semi-skirmish" formation.  To translate this into C&G, I did tick the box for skirmish capable, but these units should not be allowed to skirmish offensively.  This allows for the use of open order, which is somewhat analogous to "semi-skirmish" and needed given the amount of disruptive terrain on the table.


Allies:

Note: Yorck's Corps had a half battery of 3lbers, which I have chosen to distribute as regimental guns.  If regimental guns brings back bad memories of 1806, can always run them as a battery.


Terrain:
 Eichberg/Steinitz/Wessig/Hermsdorf is part of the "Oberlausitzer Heide- und Teichlandschaft"/Upper Lusatian Moorland which is to say there a lot of water (ponds, streams) and wooded areas.  The German Wikipedia page for the town of Weissig indicates the population in 1825 was 128. The Schloss/hunting lodge in the town was present.  Hermsdorf in 1825 had a population 195.


The Red Box is a 12.5ft x 6ft table at 1"=25paces (28mm); the Yellow Box is 1"=50paces (15mm)


The hash marks are every 30 inches (which is the width of a standard folding table in the U.S).
The woods should be medium cover.  The pond impassable.  Weissig should be a single wooden structure.  Hermsdorf and Steinitz the same, but with some light or medium lineal cover outbuildings areas.  The Eichberg is unknown, I'd suggest a gentle slope so no bonuses or as a moderate slope (cavalry cannot charge down slope; infantry charging down slope lose 1/2 movement , infantry and cavalry charging up slope lose 1/3 movement.)

You could also compress try to squeeze in the Kleine Spree, but I would consider it marshy/broken ground in 1813, rather than the channeled backs on the google maps.

Historical Scenario:
I ran this figuring a start time of 2p.m.  

Prussians deploy first with the cavalry in formation of choice, near Weissig; the horse guns limbered on the road south of Weissig.  Von Steimetz's Brigade in march column on the road approximately 900 paces south of Wessig/Eichberg.  Von Horn's Brigade at Hermsdorf in march column.  

For the French, Guyon's light cavalry began in formation of choice one move.  French can deploy between 900-1100 paces from Weissig (thus choosing to be in or out of charge range) of the Prussian cavalry.  The 18th (Lagrange) Division begins just south of Steinitz in march column.  

The first turns can be a swirling light cavalry melee or standoff, and the Prussians deploy into Weissig/Eichberg. The 18th Division should be in engagement range by 2:30-2:45.  You could also skip the precursor movements, deploy the sides as suggested by 2:30/2:45 and begin the slugfest directly.

The French Objective is to destroy the coalition forces to its front and continue its advance towards Klix.  The Prussia/Russian objective is to destroy the French if possible, and after ~3:30 p.m. becomes hold/delay the French until darkness. 

Reinforcements:
How and when the reinforcements come into play is unclear, especially for the Russian Grenadiers as detailed above. For the French 16th Division I would set them to come in around 3:45/4:00 and hit randomize, and add in the 19th Division similarly at approximately 4:45/5:00.   I would assume the Russians do not start marching until 3:30 at the earliest (dispatch to Yorck arrives at 3:00, and must travel back to Johnsdorf/Konigswartha before Raiewski steps off).  Arrival at Hermsdorf randomized from 4:15/4:30 should work. How you treat the other division (arriving in French rear at Steinitz or just reinforcing at Weissig or Hermsdorf), allows for further variation.   

Fatigue:
All forces on table have been marching a significant portion of the day.  The Prussians/Russians since approximately 1 a.m.  For a slower game, I would start all sides at "tiring" or even "tired", as fatigue management will become a significant issue in the opening phases of the game. For a more quick paced gamed I would set everyone to "acceptable".  Given the route the Prussians had to take it is certainly justifiable to start them one level below the French ("Tiring" to a French "acceptable".)

Variations:
Russian Reinforcements: Where the second grenadier division arrives at is unknown from what I can tell.  A game with the second division arriving on the road to the west of Weissig or even at Steinitz would certainly change things, though in the later case the division would be dangerously close to being cut-off by 5 p.m.  Roll a d10, on a 1-5 the second division arrives via Hermsdorf; 6-8 road west of Weissig; 9-10 Steinitz.  To model a flank march on Steinitz, I would suggest the limiting any reinforcement by 19th Division to Lacrois' Brigade and 1 battery.  The rest of the 19th Division is containing or investigating the potential presenece of coalition troops to the French rear.

De Tolly's Withdrawal Order:  How you deal with this, is up to you.  One option is to make the Prussians evacuate Weissig and Eichdorf.  In our play through, I  communicated de Tolly's order and my von Yorck responded in a colorful fashion, (not becoming an obedient a Prussian officer) that he would not disengage and withdraw in the face of the enemy to his front.  On the other hand, von Yorck managed to get cashiered for disobedience earlier in his military career, so not entirely out of character!

Playtest:

Tuesday, January 6, 2015

Combat at Konigswartha Carnage&GloryII Scenario: Part 2 Gaming Konigswartha

As we saw from the Historical Research in Part One de Tolly's spoiling attack resulted in two combats at Konigswartha and Eichberg.  Königswartha is a run away success for the coalition forces and also therefore less apt for wargaming.  Both Petre and Bowden comment on the lack of information on details of how Peyri's 15th Italian Division was surprised and overrun.   This is great from a scenario design perspective as it allows variation and, (relatively) you can't do it wrong!

History and Assumptions:
For the most part we know that Peyri's Italians had arrived in Konigswartha before 1 p.m., likely around noon, and a portion of the division was allowed to disperse into foraging parties.  Bowden's comments on the acute supply failures of the French in 1813 really illustrate how desperate for food the troops were.  Bertrand's IV Corps had not received any bread or food since May 16. Konigswartha is not on the main highway from Dresden or along the direct line of advance/retreat from Lutzen and may therefore have offered ample and tempting sources of forage.  Regardless, Peyri's outposts and pickets were clearly not sufficient.  Tschaplitz's Advanced Guard was able to reconnoiter the Italian's and their dispersal in foraging parties and request additional reinforcements.  By 1 p.m. de Tolly had arrived with additional cavalry resources and the attack was launched and the Italians were overrun.  From here it gets a bit hazy.  I assume Peyri didn't go into too much detail on his failings in his after action report to Bertrand. By 5 p.m. Peyri's 15th Division had fallen back to Wartha and the rout/pursuit was halted by the advanced guard of lost III Corps.  Konigswartha had cost the Italians ~2800 casualties, half of which were prisoners.

The challenge here is to make a game that might be worth playing on the table top.  No one really wants to game a lopsided disaster.  My assumptions are that 70% of 15th Division's losses occurred during the initial surprise attack on foraging troops and that 15th Division fell back on Konigswartha and once some order was re-established, withdrew slowly (likely in squares/closed columns) to Wartha, ~4 miles away over the next 4 hours.

Orders of Battle:
Unit Ratings are based upon Bowden's Empire V, translated roughly to C&GII.  Units have been amalgamated to fit our groups basing.  The French are based on Bowden and Nafziger.  The Allies Nafziger, supplemented by Hofschorer.  Note for the allies neither source gives actual numbers for some of the Russian divisions, and were therefore estimated. Estimate Russian Regiments were assumed to have 1 battalion of 480 men.

Concerning Grekov's Cossacks, the OOB shows them rated as C- and I don't really know why.  I input them as Irregular, Trained, Avg. Melee, Poor Fire.  I also haven't had the opportunity to use many irregular units in C&GII to know how they handle.  Rate as you will!

C&GII generally recommends a ratio of 1 officer per 3 tactical units total.   The Russians are clearly over-officered, but I wanted to show the general structure of the OOB for potential use in other rulesets and have in fact combined a few brigades already.

Two Final Points:
1) The "Reserve" under MG Sass is not included as part of Lageron's Corps.  I was crunching the numbers for the total expedition of 24,000 and his division was excluded as there is evidence supporting Tschaplitz, von Yorck, and both of Raiewski's Grenadier divisions.

2) Potentially all or only a portion of Lageron's Corps was engaged.  Likely at least one of Lageron's cavalry brigades was brought up in support.  Raiewski's Grenadiers march in support of von Yorck at around 3 p.m. at Hermsdorf (~4 miles away), which doesn't outright preclude their presence at Konigswartha, but most likely I suspect they were in reserve at Johnsdorf or Oppitz.

Allies:


France:

Terrain:
Konigswartha is relatively more open compared to Eichberg and the surrounding area.  The 3d Austrian Military Survey map shows a stream and two large ponds to the north of the town.  The German Wikipedia page for the town indicates the population in the 1800s was likely 1,100 or less. The Schloss in the town was present and I assume likely the main church.


THIS IS ALSO KNOWN AS WHY I WISH CALPE MADE PRUSSIANS IN 15/18MM
The Red Box is a 12.5ft x 6ft table at 1"=25paces (28mm); the Yellow Box is 1"=50paces (15mm)

Since the real ground scales is somewhat limited.... here is what I suggest fudging the 28mm table to:

The hash marks are every 30 inches (which is the width of a standard folding table in the U.S).
The woods should be medium cover. The steam probably a minor lineal obstacle.  The pond impassable.  Konigswartha should have at least one wooden building and surrounding light cover lineal obstacles to represent the outbuildings and outskirts of town.  Eutrich, Caminau and Neudorf should probably be treated as only light lineal obstacle outbuildings.  The table is generally more open, than likely historical.  You can increase the woods or add an additional large pond along the road to your taste.  I am usually a stronger proponent of actual ground scale, and for this scenario a more closely accurate ground scale would work, the only important factor I think for the historical scenario is that Konigswartha is relatively near one edge of the table, and the French exit point on the other.  

Historical Scenario:
Overall this focuses on the retreat in the face of a disaster for Peyri's 15th Division. 

Step One: The Surprise Attack  
Model this one of two ways:
1) Remove 3 Battalions from the French OOB.  Start the Russian cavalry as tiring or tired. Have all remaining French units take two interpenetration tests in the end turn phase (you could also randomly determine some minor morale loss and set this manually per unit) to represent the shock of the attack, and their comrades fleeing back to Konigswartha.
2) Prior to starting, GM can play the first turns, and charge do the charges against the French in march column, one round of Fire Combat/Close Combat should break the units and disperse them, with their line of retreat cut off modifier. Have all remaining French units take two interpenetration tests in the end turn phase (you could also randomly determine some minor morale loss and set this manually per unit) to represent the shock of the attack, and their comrades fleeing back to Konigswartha.

Step Two: Fatigue
Set French to Acceptable
Set Tschaplitz to Acceptable (Except Grekov and Kovslosky who should be Tiring/Tired after all that sabering!)
Set Lageron to Tiring

Step Three:  Deployment
French should be in March Column for the infantry.  As Italians were bivouacked the units should probably be somewhat dispersed around Konigswartha such that the French need to maneuver to concentrate their force.  (Variation: A brigade could be placed in either Neudorf or Eutrich [each is less than a mile from the center of Konigswartha].)  Tschaplitz and Cavalry are deployed in woods or just outside woods to the south/southeast of Konigswartha.  Lageron's infantry will enter via Neudorf. 

Step Four: Reinforcements
How much/how quickly you elect to bring up the remainder of Lageron's Corps is up to you.  There is always the randomizer under the reserve forces tab. No one knows how much of this force was or was not engaged, so you can't do it wrong.  A slower reinforcement pace will make for a tighter game. 

Objectives:
Russians: Destroy the French (Italians) by 5:00 p.m.
French: Make it off the north end of the table before the Cossacks get you!

Alternate Scenario:
We have two relatively equal forces and a historical location, time to push lead!.  The Italians were not completely asleep at the wheel.  Place Moroni at Konigswartha; Martel at Eutrich; St. Andrea/Briche halfway from Neudorf to Konigswartha. Tschalpitz begins in the woods south of Konigswartha; Lageron deploys along the table edge by Neudorf.  Everyone is in battle formations, artillery is limbered. Set Fatigue for All Sides to "Acceptable" (and maybe Lageron's corps to Tiring). Peyri's position in Konigswartha is essentially turned and his line of communications (south) are cut, so I suggest similar objectives:  Defeat the Russians or withdraw to north. Begin Slugfest.

Next Up: Combat at Eichberg Scenario


Sunday, January 4, 2015

Battle of "Eichberg" Carnage&Glory II Scenario: Part 1 Historical Research

Battle of Eichberg....Never heard of it? Neither had I, nor had I heard of "Steinitz Heights" or "Weissig" either. At most it is a sentence or two mentioning a combat between Yorck's Prussian Corps and Lauriston's V Corps as a precursor to the Battle of Bautzen.

In this series of posts I will lay out the historical maneuvers, the C&GII scenarios (yes, plural!) and finally some battle reports for the games played.

In search of smaller historical combats that can more easily fit our tables, I started scouring the 1813 campaigns for some inspiration and found several promising leads in the combats leading up to Bautzen, from Bautzen to the Armistice and the numerous combats of  Gen. Blucher's Army of Silesia before and after the Katzbach.

The revered Mr. Bowden in Napoleon's Grande Armee of 1813 intrigued me with his description of the combat of Eichberg as a "remarkable" example of the combat performance of the conscripts of 1813.  The two sentences alluded to earlier are thus: "In this combat, Lauriston's command--which numbered about 25,000 combatants--attacked and convincingly defeated a numerically superior force of Prussians.  For the loss of 1,821 casualties, the V corps killed, wounded, or took prisoner 5,000 of the enemy."

This passage intrigued me as it suggests that on May 19, 1813 (the day before Bautzen begins), a combat on the scale of Quatre-Bras in both numbers of combats and casualties occurred which never seems to be mentioned or wargamed.

Further research revealed a much more interesting picture, which more or less looks like this:


Starting with the preliminaries:
The Coalition forces have taken up prepared positions at Bautzen on the west bank of the Spree and ultimately accept battle with Napoleon's new Grande Armee on May 20-21, 1813. The area north of Bautzen is "Oberlausitzer Heide- und Teichlandschaft"/Upper Lusatian Moorland which is to say its forested, with streams, creeks, and lots of ponds.

Napoleon is concentrating his forces.  From Dresden the Guard, IV, VI, XI, XIII, and I Cavalry Corps head to Bautzen.  Marshal Ney, with III, V, and VII Corps is marching south from the environs of Luckau.  By May 18, 1813 (or morning of 19th), Bertrand's IV Corps, the Guard, and I Reserve Cavalry Corps camp in the small villages west of Bautzen.

On May 18 at 10 a.m. Berthier sends a dispatch to Ney directing him to be able to march on Börsa by May 21, passing the Spree (at Klix):

"The Emperor informs you that we are within
cannon range of the little town of Bautzen, which the
enemy has occupied as head of his position, and where he
has thrown up some entrenchments ; that on the (enemy's)
right are placed the Prussians, on the left the Russians ;
that he desires that, with General Lauriston and all your
forces united you should make for Drehsa near Gottamelde ;
having passed the Spree you will find that you have turned
the enemy's position ; you will take up a good position
there. The Emperor supposes that you are in a position to
reach Hoyerswerda completely on the 19th. You will draw
towards us on the 20th, and on the 21st you will be able
to reach the position (described above), which will either
have the effect of making the enemy retire farther, or of
putting you in a position to attack him with advantage."
[Taken from F. Loraine Petre's Napoleon's Last Campaign in Germany (1912) p.109
the Author identifies "Drehsa" as modern Brösa]

The approximately 18,000 men of V Corps arrives in Hoyerswerda on May 18th with orders to march due south to Zerna, placing V Corps to the rear of Napoleon's main army. General Ney recieves Berthier's dispatch on the morning of the 19th and issues new orders, for Lauriston to take V Corps to Klix via Oppitz at around 11 a.m. III Corps, still north of Hoyerswerda, is to march in three columns. The 8th Division and Laboissiere's Cavalry brigade as advanced guard are to march on Neudorf** (Neschwitz?); two divisions on Niesendorf and two divisions on Konigswartha. The advance of III Corps is however delayed on the 19th, by V Corps train and baggage which was still in Hoyerswerda. Meanwhile, on May 19th General Bertrand orders Gen. Peyri's 15th Italian Division north to Königswartha to establish communications with V Corps and Ney's approaching forces.

**The German Wikipedia reveals there are 6 Neudorfs in the Bautzen landkreis.  Several are also on the 3rd Austrian Survey map of Bautzen.  My personal guess is the Neudorf by Neschwitz.

The Allies intercept a May 18 dispatch from Berthier to Bertrand (IV Corps) indicating that Lauriston's V Corps would be at Hoyerswerda on the 18th and Ney's III Corps a march behind. The Coalition forces elect to launch a spoiling attack based upon this intelligence. A force of 24,000 men under Barclay de Tolly will march in the early morning of May 19 for Johnsberg and Wartha and attempt to destroy V Corps before it units with either Napoleon's main army at Bautzen or Ney's III Corps. This spoiling attack will involve 25% of the allied forces at Bautzen. De Tolly's force consists of the von Yorck's Prussian Corps, Raiewski's Russian Grenadier Divisions, and General Lageron's Corps, and General Tschaplitz's Advance Guard.

The allies step off at 1 a.m. on three different routes:

The Russian advance guard under Tschaplitz crosses the Spree at Niedergurig, passes within a mile and a half of IV Corps outposts at Lubachau and continues "direct" to Johnsdorf via the "wooded heights" to the east of the French positions.

De Tolly's main corps and Raiewski's Grenadiers cross the Spree at Klix and march for Johnsdorf via Milkel and Oppitz.

Von Yorck is directed on a more circuitous route, leaving from Borsa/Guttau to Lomischau, Lieske, and then "through the woods" to Hermsdorf, Steinitz, and Wartha.

These movements lead to two combats: Königswartha and "Eichberg".

3rd Military Mapping Survey of Austria-Hungary for Same Area as the Map Above
Königswartha:
At Königswartha Tschaplitz's Advanced Guard reconnoiters Peyri's 15th Division and finds the Italians dispersed and foraging without sufficient outposts.  The Russian cavalry quickly overrun the dispersed Italians.  Bowden states the Italians lost 2,862 casualties, including 1,289 taken prisoner.  The 15th Division's strength of approximately 10,000 was thus reduced by 25%.  It is unclear when the losses take place, but the Italian's rout to the north and are pursued by the Russians.  The pursuit ends at approximately 5 p.m. at Wartha where the Russian cavalry encounters the advanced guard of III Corps.

Eichberg/Steinitz Heights***/Wessig:
Sometime before 3 p.m. von Yorck's Prussians encounter the leading elements of V Corps in or around Wessig. Bowden and Hofschröer refer to this encounter as "Eichberg", for reasons I have been unable to divine.  The streets of Wessig and Hermsdorf have multiple references to "Eichberg", but I cannot locate any other reference.  Multiple sources also mention the "heights" occupied by von Yorck's Prussians during the initial engagement with Lauriston, but google earth, google maps, and the 3rd Austrian Survey Map don't reveal any heights of note in the area of Wessig.  Hofschörer gives the location of the encounter as to the southwest of Wessig.

***Fabry's Journal des Operations des IIIe & Ve Corps en 1813, p. 22-23 refers to an attack upon Yorck on the heights of Steinitz.

At 3 p.m. von Yorck receives an order from de Tolly, ordering the Prussians to Johnsdorf to form the reserve for an engagement with what de Tolly believes to be the leading elements of V Corps.  De Tolly had mistaken  Peyri's Italian 15th Division, for the advanced guard of V Corps.  Von Yorck evacuates his strong position at Wessig and retreats towards Hermsdorf and Oppitz to comply with this order.

On reaching Hermsdorf, von Yorck receives a second dispatch, from de Tolly informing that the Russians had learned they were engaged with the 15th Italian Division of Betrand's IV Corps, and not Lauriston.  Von Yorck is ordered to engage V Corps and to hold Wessig.  de Tolly sends Raiewski's two grenadier divisions to reinforce von Yorck.  The meeting engagement between Lauriston and von Yorck further develops, but von Yorck is unable to retake his strong position on the "heights" by Wessig. The combat lasts until nightfall when de Tolly orders a withdrawal to Klix.  The coalitions forces arrive back across the Spree on the 20th after another night march.

Google Satalite View of Combat at "Eichberg"
Crop from 3rd Military Mapping Survey of Austria-Hungary

Petre and Hofschröer list the Prussian losses at approximately 1100 men, the Russians at 900. Hofschröer notes a further 2000 stragglers were lost due to the consecutive night marches.   The French lost 2800 at Königswartha and 1800 at "Eichberg".  No significant result other than Marshal Ney pausing his march, and concentrating III Corps near Buchwalde to accept battle on the 20th. Berthier reply to Ney's dispatch quickly disabused the marshal of a delay and kept Ney's flanking maneuver on schedule for the 21st.  The coalition losses are not as severe as suggested by Bowden (citing a dispatch to Berthier), but when combined with the losses to straggling, suggests a near even trade for no strategic gain.

The following posts will deal with the scenario details and specific orders of battle for Königswartha and Eichberg and two counter-factual scenarios at Milkel.

Sources:
F. Loraine Petre, Napoleon's Last Campaign in Germany (1912)
Lt. G. Fabry, Journal des Operations des IIIe & Ve Corps en 1813
Peter Hofschröer, Lutzen & Bautzen 1813: The Turning Point, Osprey Campaign #87
Scott Bowden, Napoleon's Grande Armee of 1813 (1990)
George Nafziger's Orders of Battle, hosted Online by the US Army Combined Arms Center at:
http://www.cgsc.edu/carl/nafziger.asp